Setup the Tenancy
Last Updated: Version R2510The Tenant Administrator receives an email message to establish a login and set up the tenancy. Once logged in, the Administrator can view and verify tenancy account information and manage licenses.
Only the Tenant Administrator can view this screen. This screen provides License Management and Subscription Details.
-
Click Settings.
-
Select Account.
The Company Name, Subscription Date, Administrator Name, and Administrator Email are for verification only, and cannot be changed.
-
Click Multi-Factor to enable dual authentication for extra security. When enabled, this feature requires users to enter their login credentials, and then also enter a code that is sent to their email address. Refer to Login with MFA or SSO to view the user instructions for logging in.
-
Click Single-Sign-On to enable sign-on with Entra ID. For information about SSO, refer to Configure Single Sign-on.
-
Click Save.
Batch Removal
To optimize storage and system performance, choose an option from the Remove Completed Batches After list. Select the number of days from the list such that when the frequency is reached, that batch is automatically deleted. Options are Never, On Completion, 7 days, 14 day, 1 month, 2 months, 3 months, 6 months, 12 months, 24 months, or 36 months.

Alternatively, you can also click Remove Batches Now to choose specific batches based on criteria such as batch type, batch creation date, and batch status.
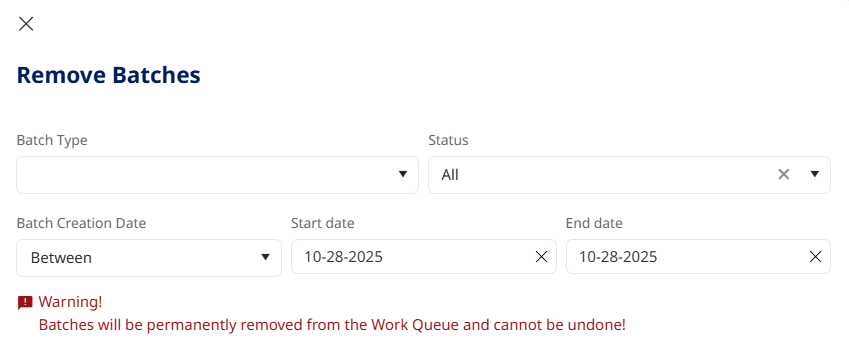
Note that when a batch is deleted using this method, it is permanently removed the Work Queue and cannot be restored.
License Management
The name of the Activated license is provided on screen, and you can click Manage Licenses to view the full licensing screen. This screen lists all current and previously activated licenses for this tenancy to date.
To enter a new license code
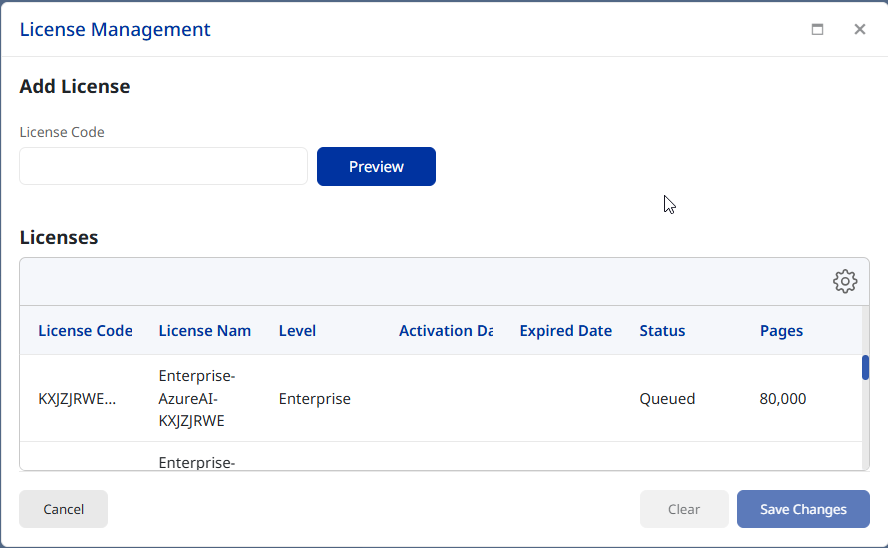
If a license has not been set up and applied to this tenancy, you may be provided with a license code that you can activate. Enter the code in the License Code field and then click Preview. The License Management screen provides the following information related to the license:
-
Package Level: Essentials, Professional or Enterprise.
-
Supported AI Providers: Azure AI and/or Natif AI
-
License Length: Duration of the license in days. This duration is used to determine the expiration date when the license is first activated.
-
Total Pages: The number of pages that can be used for processing
After confirming the license details, select Create from the Action list, and then click Add to activate the license.
To extend or expand an existing license
Extending a license extends the duration of the license(in days) prior to expiry, whereas expanding a license adds features or functionality to the license terms. Once you purchase the license and obtain the code, and paste it in to the License Code field. Click Preview.
To extend the license: Select Extend from the Action list and then click Add. Once saved, the license will be in Queue status, which means that the license will be automatically activated once the current license expires. For example, if the current license was activated on January 1, 2025 and had a license duration of 365 days, this extended license will activate on January 1, 2026 because the current license expires on December 31, 2025.
To expand the license: Select Expand from the Action list and then click Add. Once saved, the terms of the license are updated. For example, you may have purchased additional processing pages, or added another AI provider. Expanding a license does not extend the expiration date of the license.
Ensure you click Save Changes to activate the licenses. If a license fails to activate, the status is set to 'failed' and you can retry activation before contacting support for help.
Subscription Details
Tenant administrators can track the total pages used versus available in their current annual subscription. The Account page also displays the subscription expiration date.

Once the subscription usage reaches 70% depleted, an email is sent to the Tenant Administrator indicating the status.
This screen also provides the ability to set up alerts when a Batch fails. Refer to Setup Batch Failure Alerts for details.