Process Flow Example: RCIP Connector
Last Updated: Version R2601The customer wants to integrate with the RICOH Cloud Integration Platform. When an Operator scans a new batch, the customer wants the Operator to enter a specific communication string that will be validated and passed back to RCIP.
Prior to configuring this process flow, the Designer must configure the following:
-
An RCIP integration to use within the process flow as the folder that will connect to the RCIP Base URL to obtain services and workflows. Follow the instructions in RCIP Integration to configure the base integration.
Follow these instructions to create a new batch type that contains the following:
-
A batch field that must be checked for a specific structured communication string.
-
A document field that requires the Operator to enter the specific string
-
A process flow that contains a connector to the RCIP services and workflows. This example allows the Operator to start a new batch, and the RCIP connector automatically checks the documents for a specific value and then returns a value with the result (in this case valid or not valid). A Validation task ends the process flow to ensure an Operator checks the results.
Part 1: Configure the Batch Settings
-
Choose Settings.
-
Choose Batch Type Library.
-
Click Create New Batch Type.
-
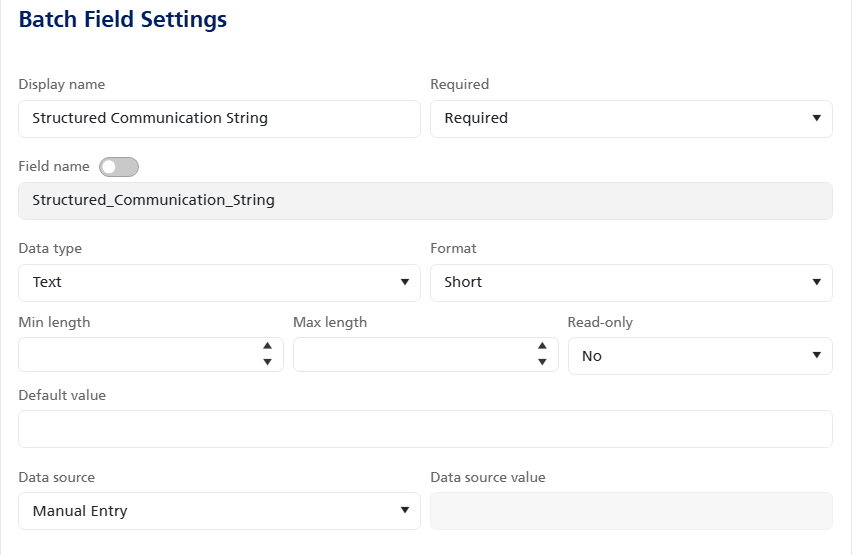
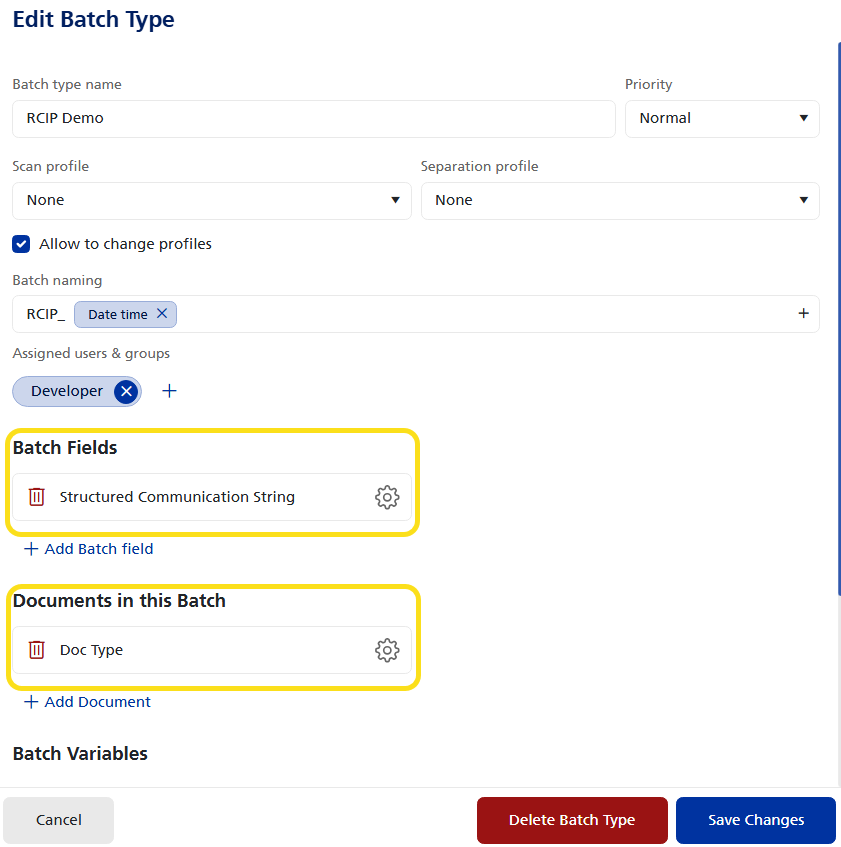
In the Batch Fields section, click + Add Batch Field. Enter a name for the field, and then set the field to Required. In this example, the data type is set to Text. Click OK to return to the Edit Batch Type screen.
-
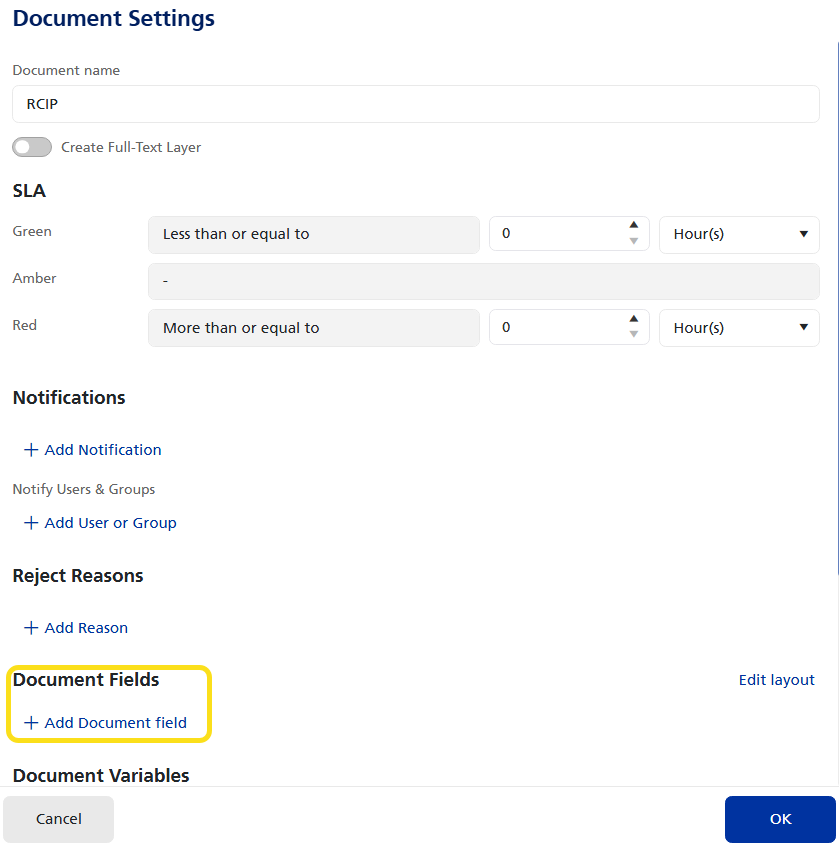
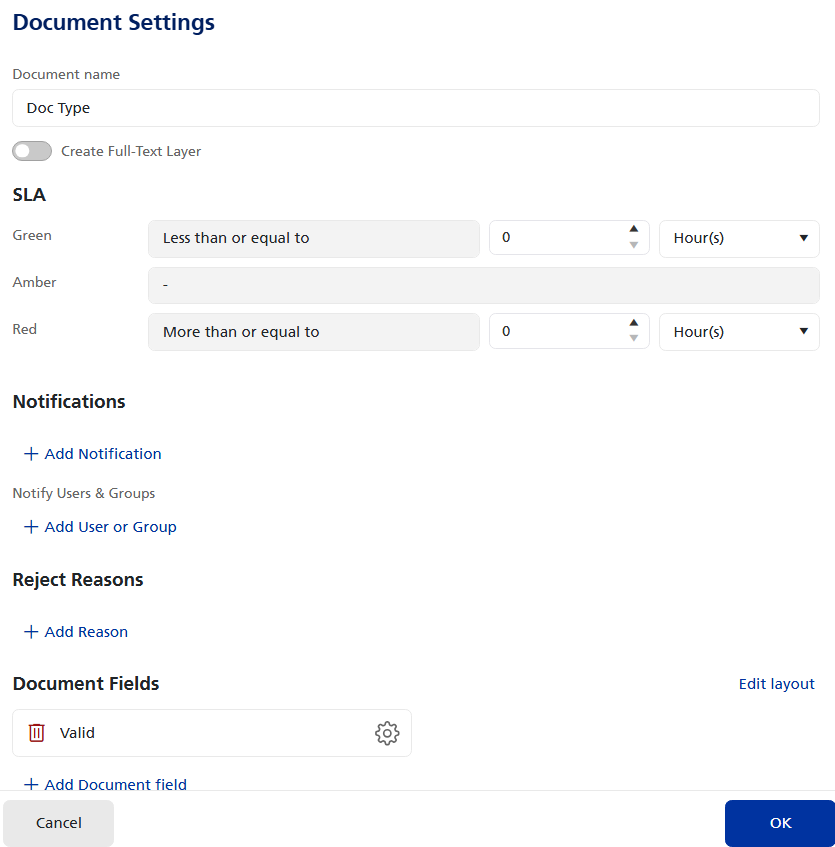
In the Documents in this Batch section, click +Add Document and then select Manual Indexing. In the Document Settings screen, enter a document name, and then click + Add Document Field.
-
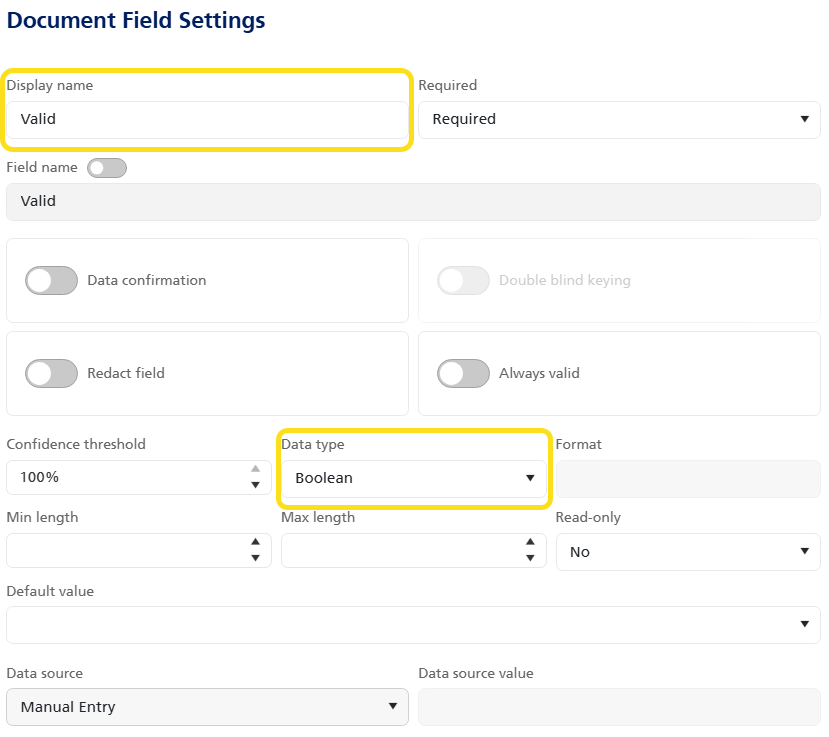
In the Document Field Setting screen, enter a display name for the field, change the Data type to Boolean, and leave the other settings at their defaults. Click OK to return to the Document Settings screen.
Setting the Data type to Boolean provides a yes/no (or in this case valid/not valid) result.
-
The Document field you just configured is now displayed by name under Document Fields, as shown below.
-
Click OK to return to the Edit Batch Type screen. The screen should now have at least one batch field and one document in this batch identified.
Part 2: Configure the Process Flow
-
Click the Gear icon
 to open the Process Flow screen.
 Add a task to start the batch
-
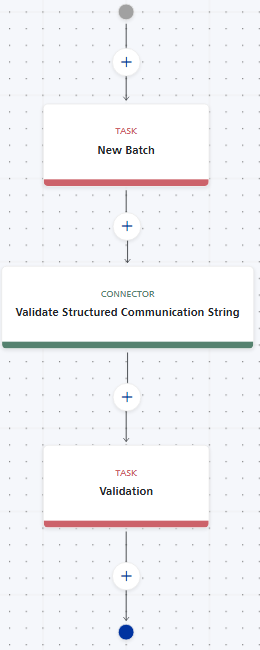
Drag and drop a Task from the Steps to the first + symbol.
-
In the Task screen, enter a name to identify this task. For example, 'New Batch'.
-
From the Type list, select New Batch. Select Document Options as needed.
-
Click OK to complete the Task step and return to the Process Flow.
Add a Connector for the RCIP integration
-
Drag and drop a Connector from the Steps to the + symbol AFTER the initial task.
-
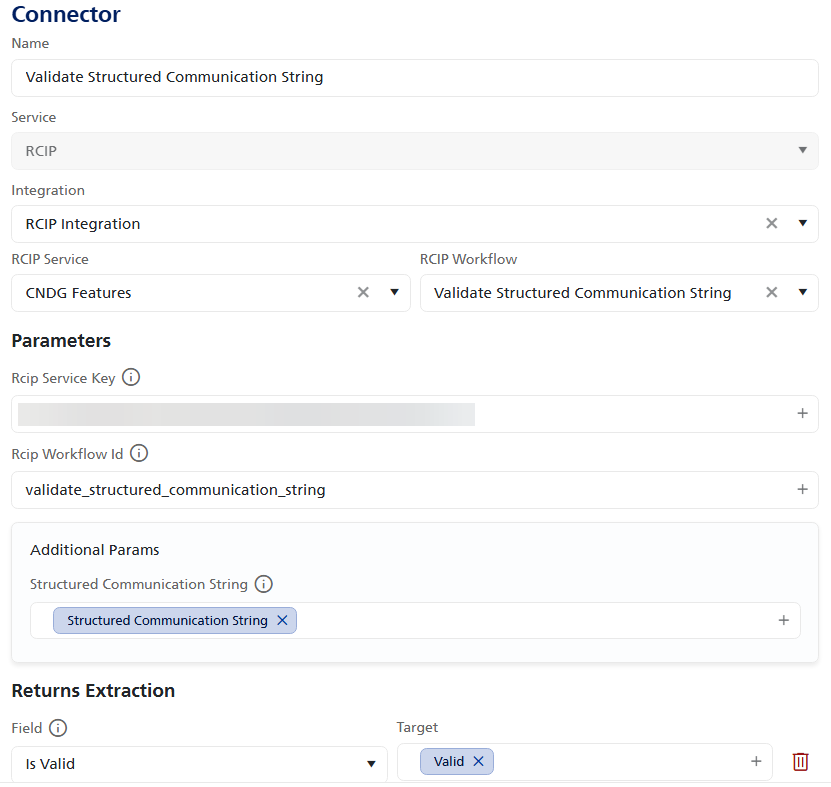
Enter a name for this connector in the Name field. This example uses 'Validate Structured Communication String' for illustration purposes.
- From the Service field, select RCIP.
- From the Integration field, select a pre-configured RCIP integration. RICOH IA will contact the RCIP integration to obtain the services and workflows.
- Select an RCIP service and an RCIP workflow. The Parameters fields appear, and you can enter the correct data in the fields.
- In the Returns Extraction section, select Is valid from the Field list, and then select the corresponding variable from the Target list. Click OK to return to the Process Flow. The results of the validity check is captured in this field and is sent back to RCIP.
Add a Validation task
-
Drag and drop a task Step AFTER the connector.
-
In the Task screen, enter a name to identify this task. For example, 'Validation'.
-
From the Type list, select Validation. Select Document Options as needed and assign one or more users and groups.
-
Click OK to complete the Task step and return to the Process Flow.
-
Click Save and Publish and then click < Back to Batch Type Settings.
The Operator will choose this Batch type, and then proceed to scan documents. Once scanned, the Operator will enter the correct data in the required field. In this example, the field for text entry is called 'Structured Communication String', as shown below.
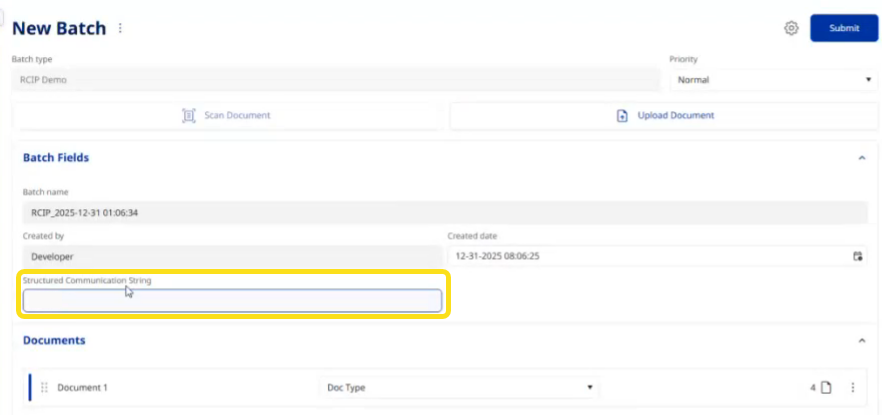
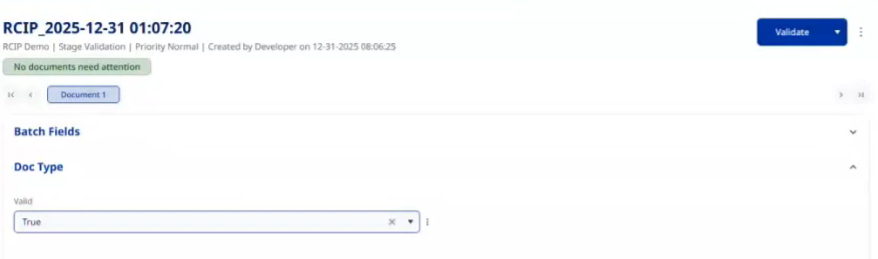
Once the Operator submits the new batch with the text entered in this field, the process flow moves forward to the Validation stage. The Valid field is shown with the result of the validation. In this case, the value is set to True because the user entered the correct data in the Structured Communication String during the new batch scan. When the user clicks Validate, the data is forwarded to RCIP.